How to Use Ratchet Straps: No More Tangling
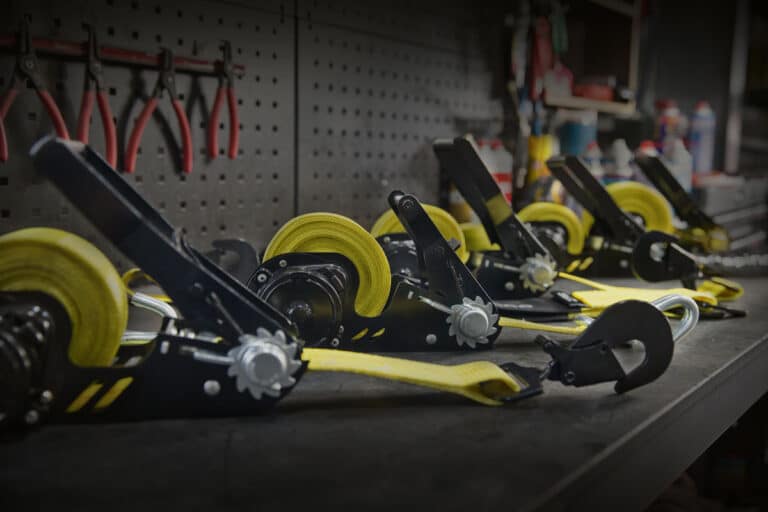
Ratchet straps, also known as tie-downs or lashing straps, are one of those tools you don’t think much about until you really need them. These tough little workhorses are a must-have for anyone who moves heavy stuff, hauls furniture across town, secures an ATV to a trailer, or straps down a stack of lumber for a job site. But here’s the thing: a lot of folks use them wrong.
They overtighten and damage their gear, or worse, don’t secure their load properly and risk an accident. And if you have ever had one jam up or freeze in the cold, you know the frustration. In this guide, I’ll walk you through everything from setting them up the right way, avoiding the most common mistakes, to a few tricks I have learned over the years to make ‘em last longer and work better. Let’s get to it.
What Are Ratchet Straps?
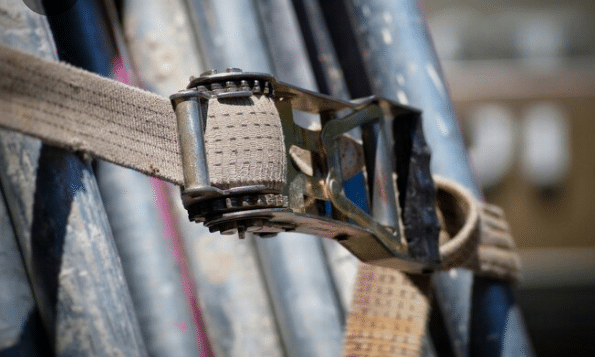
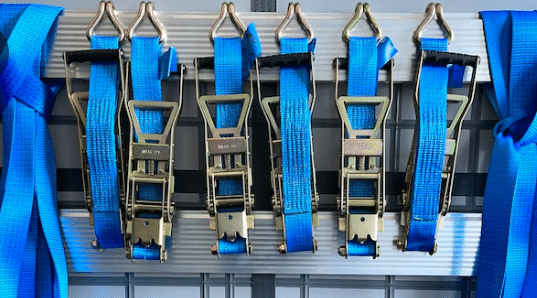
Ratchet straps are heavy-duty straps designed to keep your cargo locked down and secure while you are on the move. Some folks call ’em tie-down straps or lashing straps. Well you get it, it’s all the same idea. They are built to hold things tight for when you are moving across town or hauling gear across state lines.
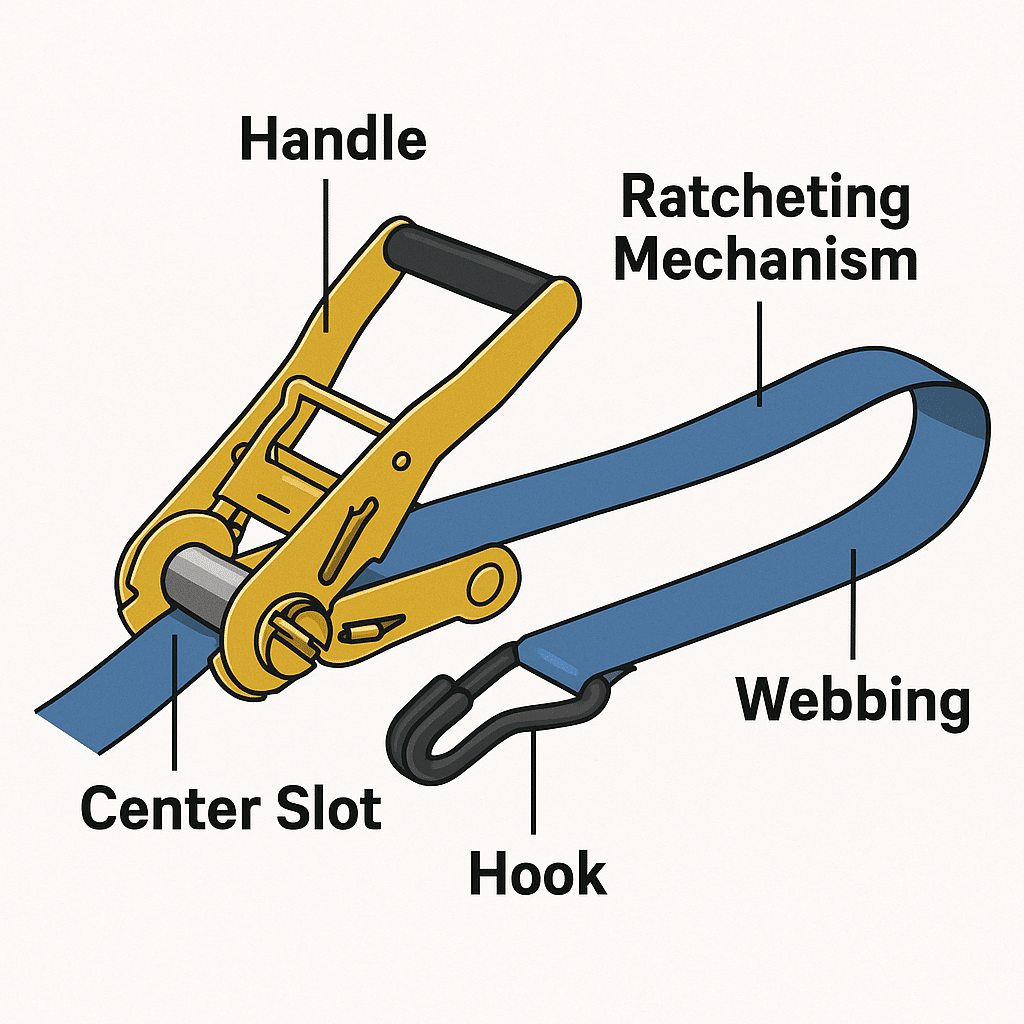
A standard ratchet strap has a few key parts:
- The handle, which you crank to tighten the strap.
- The ratcheting mechanism, which locks everything in place so it doesn’t slip.
- The webbing, that strong polyester strap that wraps around your cargo.
- And the hooks on either end, which latch onto anchor points in your truck bed or trailer.
That’s the basic anatomy. Simple enough, but tough as nails when you use them right. (We’ll drop a diagram below so you can see how everything fits together)

Step-by-Step: How to Use Ratchet Straps Correctly
Using ratchet straps the right way isn’t rocket science, but if you rush through it or skip a step, you’re asking for a headache, or worse, a busted load on the highway. Follow these steps, take your time, and you’ll have everything strapped down tight and safe.
Step 1: Inspect and Assemble Your Ratchet Strap
Before you even think about tightening anything, give your straps a once-over. Look for frays in the webbing, rust on the hooks, or any busted parts in the ratchet itself. If something looks sketchy, don’t use it. A failed strap at 70 mph isn’t worth the risk.
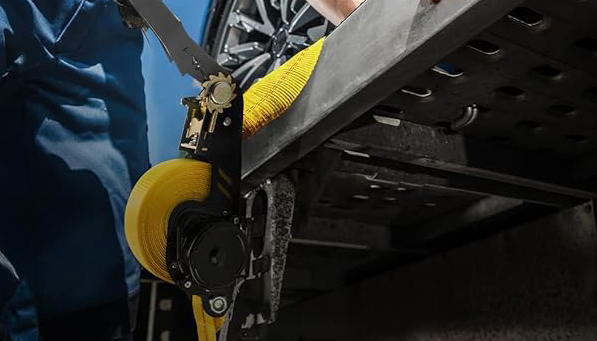
Now, threading the strap’s pretty simple:
- Open the ratchet handle all the way until it lays flat.
- Take the loose end of the webbing and feed it through the slot in the center spindle.
- Pull it through and bring it back toward you. Don’t worry about getting it tight yet. That comes next.
(If you’re not sure where the slot is, check the diagram below. It’s usually right in the middle of the ratchet.)

Step 2: Hook It Securely
Next, hook both ends of the strap to solid anchor points. And I mean solid. D-rings, trailer rails, frame loops (something that won’t bend or break under pressure). Don’t get lazy and hook it to a bumper or plastic tie-down loop. If your hooks don’t sit tight or look sketchy, reposition things until they do. Remember: the strap’s only as strong as what you’re hooking it to.
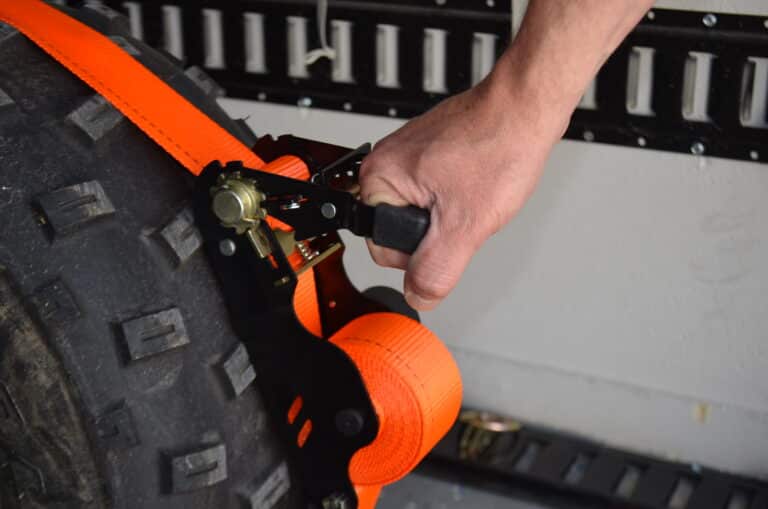
Step 3: Ratchet to Tighten
Now comes the fun part. Grab the handle and start ratcheting just like pumping a lever. Every crank pulls the strap tighter around your load.
Tip: Don’t crank it like a gorilla. Get it snug, not strangled. You want tension, not crushed cargo. Once it’s tight, give the load a little shake. If it wiggles, ratchet a few more clicks. If it doesn’t budge, you’re good.
Step 4: Check and Monitor Load
Before you hit the road, double-check everything. Look at your anchors. Tug on the strap. Make sure nothing’s pinched, twisted, or sitting funny.
Tip: If you are hauling something like a motorcycle or ATV, check it again after about 10–15 miles. Straps can settle and loosen a bit once the vehicle bounces around. Trust me. Just pull over and check. It’s five minutes now or five hundred bucks later.
Step 5: Release the Strap Safely
When it’s time to unload, don’t just yank stuff loose like a maniac.
- Pull the small release tab on the ratchet (usually near the top handle).
- Open the ratchet all the way until it lies flat.
- The mechanism should unlock and let you pull the strap free.
Safety tip: Don’t stand directly in line with the strap when releasing, especially if it is under heavy tension cus things can snap back fast.
Tips for Mastering Ratchet Straps
Once you got the basics down, there are a few tricks that are gonna take your strap game to the next level. These tips don’t just make your setup look cleaner. They help protect your gear, save you time, and keep everything riding smooth from Point A to Point B.
1. Use Edge Protectors or Corner Blocks
If you are strapping down something with sharp edges like a pallet of bricks, a metal cabinet, or even a boxed tool chest, don’t let the webbing sit right on the corner. That is exactly how straps get sliced mid-haul. Throw on an edge protector or a corner block. You can buy them cheap, or even use an old chunk of rubber or folded cardboard in a pinch. It spreads the pressure out and saves your strap from wear and tear.
2. Wrap That Extra Webbing Properly
Don’t just let the extra strap flap in the wind like a stream behind a bicycle. That stuff can tangle, whip your paint job, or worse, get caught in your wheels. Once you are ratcheted tight, wrap extra webbing neatly while the strap is in use to keep it from flapping or catching. You can even tuck it under the strap run if you’re in a rush. Just don’t let it drag, nothing looks sloppier.
3. Match Your Tension to the Load
More isn’t always better when it comes to tightening down. Every strap has a Working Load Limit (WLL) and break strength, you can usually find it printed on the label. Know what you’re hauling and use enough straps to share the load evenly. Over-tightening a light item can crush it. Under-tightening a heavy one? Well, you might be picking it up off the highway later.
General rule of thumb: Use at least two straps for anything over 300 lbs, and balance them out across anchor points.
Read more: A Detailed Guide to Breaking Strength vs Working Load Limit
Bonus: Learn a Quick Release Trick
Want to save time unloading? Before you tighten things down, roll up just a bit of slack behind the ratchet. That little bit of extra coil will make it easier to pull through and unwind later. One of those little time-savers nobody tells you about.
Common Mistakes to Avoid
Even seasoned haulers mess these up from time to time, but if you catch them early, you are gonna save yourself a busted strap, damaged cargo, or a nasty surprise mid-haul. Here are the most common screw-ups to avoid when working with ratchet straps:
1. Over-Tightening the Strap
More tension doesn’t always mean more security. Cranking down too hard can crush your cargo, bend metal, or even warp a trailer deck. Plus, it puts extra wear on the ratchet mechanism. Snug is good. Stupid tight? Not so much. Give the load a wiggle test, and if it’s not shifting, you’re done.
2. Using Damaged or Mismatched Components
If you skipped the inspection step earlier and you’re using a frayed or rusty strap, you’re asking for failure. Always check before use. A bad hook or torn webbing isn’t worth the risk, no matter how “minor” it looks.
3. Tying Knots Instead of Storing Properly
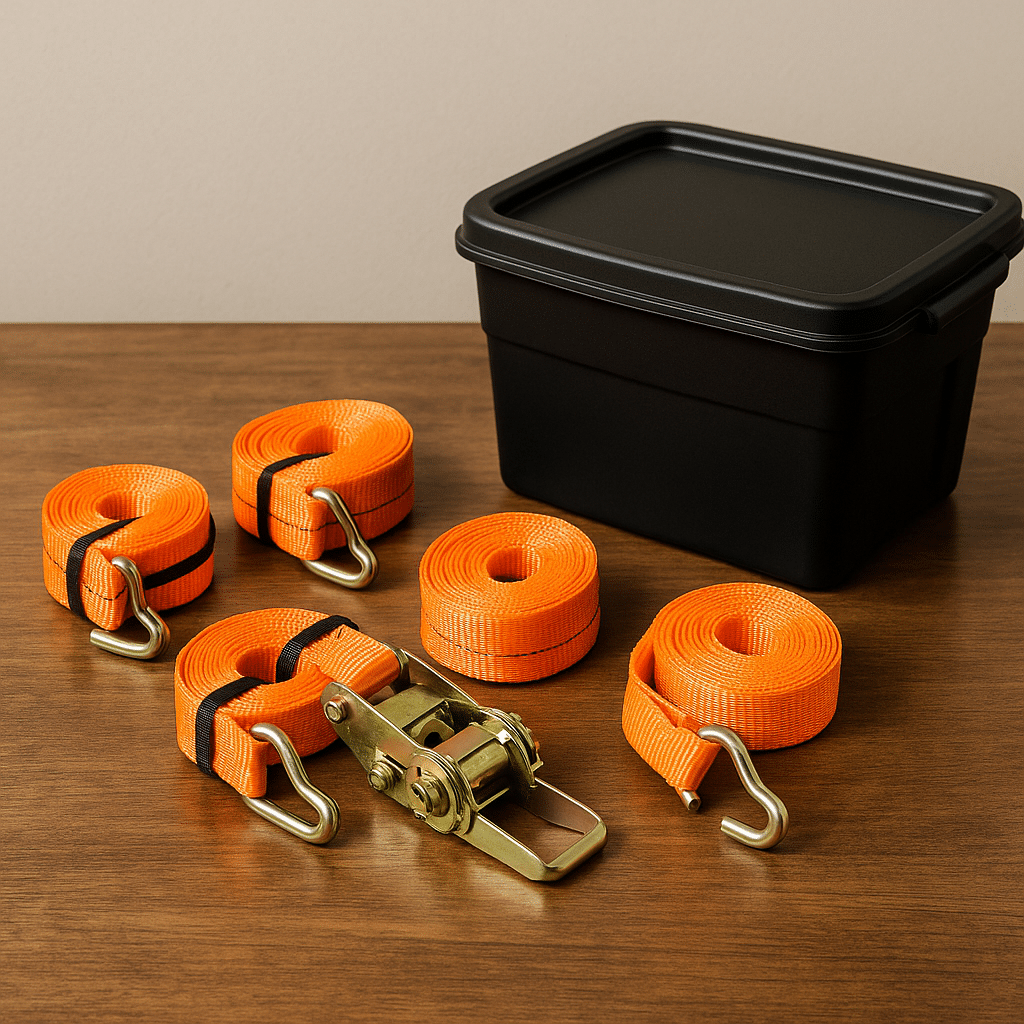
After a job, some folks ball up their straps or tie a big knot to “keep it outta the way.” Bad idea. Knots can damage the fibers and reduce the strap’s strength big time (and probably would turn your toolbox into a rat’s nest as well). Instead, roll ‘em up nice and tight, use a Velcro strap or rubber band, and toss them in a clean, dry bin. Treat your straps right and they will last for years.
4. Not Using Enough Straps for Wide or Heavy Loads
One strap across the middle of a heavy item? That’s just asking for trouble. Wide loads need multiple points of contact to stay put. As a rule: two straps minimum for anything over 300–400 lbs, and always crisscross them when you can. More straps mean better weight distribution and built-in backup if one fails.
Now you know what common mistakes to avoid, so skip these rookie mistakes and your gear (and your sanity) will thank you.
Ratchet Strap Maintenance & Storage
Ratchet straps take a beating like dirt, rain, sun, you name it. If you want yours to last more than a season or two, a little upkeep goes a long way. Think of it like changing your oil or sharpening your tools: take care of them, and they’ll take care of you.
1. Clean and Dry After Every Use
Don’t just toss your straps in a muddy toolbox after hauling. If they are covered in dirt, salt, or grime, hose them off and hang them up to dry. Webbing can hold moisture, and that leads to mold, mildew, and rot, not to mention rusted metal parts.
If they are really filthy, a bucket of warm soapy water and a scrub brush does the trick. Just make sure they are completely dry before you store them.
2. Store in a Dry, Cool Spot
Extreme heat, cold, and humidity will break down the fibers and metal over time. Best place to keep your straps? A sealed tote, drawer, or tool bag in a temperature-controlled garage or trailer. And whatever you do, don’t leave them in the bed of your truck year-round. That is a fast track to dry rot and corrosion. FOR REAL.
3. Use Strap Wraps or Containers
Those plastic bins from the hardware store? Perfect. Roll each strap up tight, secure it with a rubber band, Velcro strap, or even a zip tie. Keep things tidy and tangle-free. If you are on the road a lot, invest in a dedicated strap bag or pouch. Nothing worse than trying to untangle five rat’s nests while your cargo is waiting.
4. Know When to Toss a Strap
This one is very important. Inspect your straps every time you use them. Look for:
- Frayed or cut webbing
- Burn marks or stiffness from sun exposure
- Rusty or bent hardware
- Worn stitching or broken hooks
If you see any of that, retire the strap. Don’t risk it just because it “still kind of works.” Ratchet straps are cheap, but accidents aren’t.
Safety Standards & Regulations
If you are hauling gear on public roads especially heavy stuff, you are not just doing it for yourself. You have got to think about the folks driving behind you. That is exactly where safety standards come in. Whether you are a weekend warrior with a trailer or a full-time hauler, it’s worth knowing the basics of what the Department of Transportation (DOT) and Federal Motor Carrier Safety Administration (FMCSA) expect when it comes to securing cargo.
Understand the Numbers: WLL & Break Strength
Each strap is rated for a Working Load Limit (WLL), which is the safe load it can hold. The break strength is usually 3x higher but never go near that.
- WLL (Working Load Limit): This is the maximum weight the strap can safely hold during normal use. Always stay under this number.
- Break Strength: This is the point where the strap could snap. It’s usually 3x the WLL, but you should never load a strap anywhere near that number.
Straps must be labeled. If your strap doesn’t have a visible tag with this info, toss it. DOT considers unlabeled straps non-compliant, and you could get flagged during an inspection.
DOT & FMCSA Requirements at a Glance
Here are a few key rules that apply to most light and commercial loads:
- Two straps minimum for any object over 5 feet long or weighing more than 1,100 lbs.
- Four straps required for things like vehicles or equipment over 10,000 lbs.
- Straps must be in good condition: no major wear, fraying, or damaged hardware.
- Anchor points matter: tie-downs must be secured to proper mounts, not just “whatever’s there.”
Want the official word? Here’s a link to the FMCSA Cargo Securement Rules page if you want to get into the nitty-gritty.
What Are The Struggles of Using Ratchet Straps
Let’s be honest. Ratchet straps are great, but they are not always fun to deal with. If you have ever had one jam up, freeze solid in winter, or turn into a tangled mess mid-haul, you’re not alone. Here are some of the most common headaches folks run into (yes, even experienced haulers):
1. Straps Getting Jammed or Stuck
This one is a classic, not gonna lie. You feed too much slack through the spindle or crank too fast, and suddenly the ratchet locks up like a vice. You’re left digging in with a screwdriver or yanking like a madman just to free it. It’s frustrating and time-consuming. Ugh.
“It’s like the strap disappears into the void and the ratchet refuses to open… I’ve lost whole mornings to this.” Reddit user
2. Webbing Freezing or Stiff in Cold Weather
Straps don’t like winter. When the webbing freezes or gets soaked and stiff, you are gonna struggle just to tighten things up or release the mechanism.
3. Too Much Slack and Tangles
If you don’t wrap the excess strap properly, it turns into a spaghetti mess. You will waste time untangling it every time you want to use it, especially if you just tossed it in a bucket or bag without thinking.
4. Loosening Mid-Trip
Not getting enough bite? You might find your load has shifted or straps gone slack after just a few miles on the highway. Some straps lose tension due to vibrations or poor anchor angles.
5. Storage Frustrations
Leaving straps wet, knotted, or in a pile leads to mildew, stiff webbing, or damaged fibers. And when you’re in a hurry, trying to untangle a wet rat’s nest of straps is the last thing you want to deal with. So yes. Ratchet straps get the job done, but they come with their fair share of quirks and learning curves.
Any Alternatives?
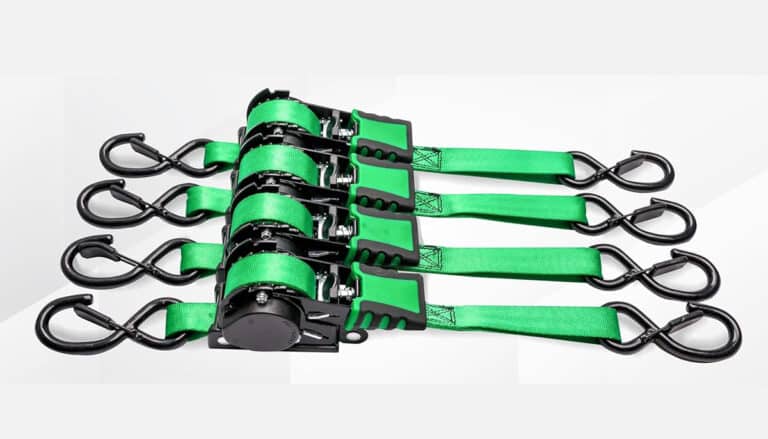
Absolutely. And this is where retractable ratchet straps really shine.
Why Retractable Ratchet Straps Are a Game Changer
If you are tired of tangled webbing, jammed ratchets, or sloppy storage, retractable ratchet straps might just be what you’re looking for. With a retractable design, the webbing automatically winds itself into a clean housing, kind of like a seatbelt. No more loose ends flapping in the wind. No more having to roll or tie anything up. You pull out what you need, ratchet it tight, and it stays neat, clean, and ready for next time.
Here’s why folks love them:
- Fast setup and takedown
- No tangled slack
- Clean storage every time
- Lower chance of jamming or overfeeding
And this is what we specialize in: high-quality retractable ratchet straps built to save you time, reduce frustration, and make your hauls smoother. Whether you are strapping down motorcycles, appliances, or lawn equipment, we have got a retractable model that’ll make your life easier.
[Shop Strapinno’s retractable straps here.]
But Don’t Count Out Traditional Straps
Now, all that said, traditional ratchet straps still have their place. They come in longer lengths, more heavy-duty varieties, and they’re great when you need full control over tension or specific anchor setups. If you are hauling especially large or heavy cargo, or need multiple straps for complex loads, traditional straps still get the job done and always will.
FAQs
1. What is a ratchet strap used for?
A ratchet strap is used to secure cargo during transport such as hauling furniture, motorcycles, ATVs, appliances, or construction materials. Ratchet straps keep things locked down tight so they don’t shift, slide, or fall during transit. They’re popular in moving trucks, pickup beds, flatbed trailers, and even roof racks. The ratcheting mechanism allows you to apply and lock in tension much tighter than a standard rope or bungee cord.
2. How to attach ratchet straps?
Attaching a ratchet strap is pretty straightforward once you get the hang of it. First, hook each end of the strap to solid anchor points like D-rings, trailer rails, or any built-in loops that are strong enough to handle the load. Then, take the loose end of the webbing and thread it through the center slot in the ratchet mechanism. Pull the slack all the way through until the strap is snug, and then start cranking the handle to tighten it down. Once you have got the tension where you want it, close the ratchet handle fully to lock everything in place. That’s it. You’re strapped in and ready to roll.
3. What is the difference between ratchet straps and tie-down straps?
Technically, ratchet straps are a type of tie-down strap, but not all tie-downs have a ratchet mechanism.
- Ratchet straps use a mechanical ratchet that allows you to apply serious tension and lock it in. They are stronger and more secure, great for heavier loads.
- Tie-down straps can include cam buckle straps, bungees, or ropes, usually better for lighter or more delicate cargo where over-tightening is a risk.
If you want the best of both worlds, which is strength and ease (and safety!), you are in luck because retractable ratchet straps combine ratcheting power with the simplicity of self-storage.
4. What do Americans call ratchet straps?
In the U.S., people call them:
- Ratchet straps
- Tie-down straps
- Lashing straps
- Sometimes just “ratchets” or “tie-downs”
“Ratchet strap” is the most common term, especially among truckers, movers, etc.
5. What not to do with ratchet straps?
Here are some common mistakes to avoid:
- Don’t overtighten. It can crush your cargo or damage your trailer.
- Don’t use straps with frays, rust, or broken parts.
- Don’t tie knots in the webbing because it weakens the fibers.
- Don’t hook to flimsy or plastic tie-down points.
- Don’t leave them outside long-term because sun and moisture shorten their lifespan.
- And don’t ignore the Working Load Limit (WLL) cus overloading a strap is dangerous.
If you’re using retractable ratchet straps, avoid yanking on the mechanism or letting it retract violently. Treat it like a seatbelt reel!
6. Are ratchet straps legal?
Yes, ratchet straps are 100% legal and actually required by law in many situations. The Department of Transportation (DOT) and FMCSA have clear rules about securing loads.
For example:
- Loads over 1,100 lbs or 5 ft long usually require at least two straps.
- Heavier equipment may need four or more.
- Straps must be in good condition and properly rated for the load.
As long as your ratchet straps are rated, labeled, and in good shape, you are well within legal use.
7. Do ratchet straps loosen over time?
They can especially if:
- The strap wasn’t pulled tight enough during setup.
- The load shifts and settles during transport.
- Vibration from the road causes slow slippage.
To prevent loosening:
- Double-check tension after the first few miles.
- Always remove slack before ratcheting.
- Use quality hardware with good grip.
Retractable ratchet straps tend to hold tension better in light-duty situations because they retract excess slack automatically, but always check mid-haul if you’re carrying something valuable.
8. Why are ratchet straps so hard to use?
Ratchet straps can feel tricky at first because:
- Threading the strap wrong causes jams.
- Overfeeding slack makes the drum lock up.
- Releasing the ratchet requires understanding the release tab.
- Long straps can tangle and become a mess.
The learning curve is real, but once you get the hang of it, they are quick and efficient. Want to skip the headache? Retractable straps eliminate tangling and jamming, which makes them much easier to use!
9. Should you twist a ratchet strap?
Only twist a strap if needed to prevent wind vibration. A slight half-twist in a long strap can stop it from flapping and humming at high speeds. But don’t go overboard:
- Too many twists reduce strength.
- Avoid twisting near anchor points or where the strap touches the cargo.
If wind noise is your main issue, retractable ratchet straps with built-in tension retraction help reduce flap without the need for twisting.
10. What is the life expectancy of a ratchet strap?
It depends on:
- Usage frequency
- Weather exposure
- Storage habits
With proper care, a quality ratchet strap can last 3 to 5 years or more. Straps that are left in the sun, rain, or used in harsh conditions may wear out faster.
Extend lifespan by:
- Storing in a dry, cool place
- Cleaning and drying after each use
- Inspecting regularly and retiring damaged ones
FYI, Retractable ratchet straps tend to last longer because the webbing stays protected inside the housing when not in use, reducing UV and weather damage.