Ultimate Guide to Securing Vehicles & Outdoor Gear with Retractable Ratchet Straps
You ever tried loading up your bike, kayak, or even that beat-up old couch, only to realize your straps look more like spaghetti than tie-downs? Yeah, same. Regular ratchet straps get the job done, sure, but half the time you are fighting with twisted webbing, mystery knots, or that one strap that somehow shortens itself right when you finally cinch it down.
Now, here’s the thing: when it comes to securing vehicles and outdoor gear, stuff that’s heavier, pricier, and honestly way more dangerous if it shifts mid-ride, “good enough” just doesn’t cut it. That’s where retractable ratchet straps come in. Think of them as the seatbelt upgrade for all your toys: dirt bikes, ATVs, boats, jet skis, canoes, you name it.
Maybe you have seen them pop up in a hardware aisle or on a buddy’s trailer and thought, “Cool, but are they really strong enough?” Or, “Do I actually need these, or is this just another shiny gadget?”
Well, you’re in the right spot. This guide is your crash course (minus the actual crash) on how to tie down vehicles and outdoor gear with retractable ratchet straps, including what works, what doesn’t, and how to keep your cargo locked in tight without losing your sanity. Grab a coffee (or a cold one, no judgment), and let’s break down the smart way to haul your toys.
Why Use Retractable Straps for Vehicle & Outdoor Transport?
Here’s the deal: moving a kayak down the block is one thing. Hauling a dirt bike across town or dragging a jet ski to the lake? Whole different ball game. That’s when your tie-down system goes from “eh, whatever works” to “this better not budge an inch.”
Traditional ratchet straps will hold, sure, but they come with the usual suspects: extra tail flapping in the wind, knots that belong in a Boy Scout manual, and that one strap you can never quite get tight enough. Not fun when you are staring in the rearview mirror wondering if your ATV is about to bail off the trailer.
Retractable ratchet straps fix all that. They’re self-storing (no loose ends to tuck), quick to tighten, and just as strong as their old-school cousins. Think of them as seatbelts for your gear: click, pull, lock, done. No wrestling, no fuss, no roadside “strap surgery.” When you’re transporting vehicles or heavy outdoor equipment, the payoff is huge:
- Time saved: cinch it down in seconds.
- Peace of mind: no flapping webbing, no slipping.
- Less damage: your kayak, motorcycle, or boat doesn’t get scuffed by loose straps.
- More safety: because nobody wants their cargo becoming a highway hazard.
Bottom line? If you are hauling anything with wheels, fins, or handlebars, retractable straps aren’t just a convenience. They are your insurance policy against the “oh crap” moments on the road.
On-Land Transport & Equipment
Cars, ATVs/UTVs, Snowmobiles, Lawn tractors: transport straps
Dirt bikes, bicycles: outdoor straps
1. Cars: How to Tie Down a Car Without Losing Your Mind
So you’ve got a car on a trailer, great. Now comes the part that makes most people sweat: strapping it down so it doesn’t end up as tomorrow’s viral “cargo fail” video. Don’t worry, it’s not rocket science. With a good set of retractable ratchet straps, you’ll have that car locked in tight in just a few minutes. Here’s how to do it step by step.
Step 1: Prep the Ride and the Trailer
Drive your car onto the trailer and get it centered over the axles. That balance is what keeps the trailer steady when you hit bumps. Parking brake on, engine off. Before you even touch a strap, do a quick check: trailer solid? tie-down points in good shape? straps rated for your car’s weight? A 60-second once-over here saves you from an “oh no” moment later.
Step 2: Pick Your Tie-Down Style
- Best choice: axles or tires. Wrapping around the axles (or tires) keeps the suspension free to move naturally and takes the stress off your straps.
- Not-so-great: frame. Hooking straight to the frame might look tough, but it compresses the suspension and beats up both the straps and your car over long hauls.
Step 3: Strap the Axles
Loop your axle straps snug around the axles- no sharp edges, no brake lines in the way. Snap the retractable straps onto the axle straps and then hook them into the trailer’s tie-down points.
Step 4: Ratchet It Down
Here’s where retractables shine. No threading, no wrestling with extra strap tails, just crank the handle until the strap’s snug. Tight, but not gorilla-tight. You want the car secure, not squashed.
Step 5: Keep It Straight
- Straight pulls are best. They reduce weird sideways tension that can wear straps out fast.
- Crossing straps? Only if spacing makes it necessary. Some setups use straight pulls on one end and crossed straps on the other. It’s totally fine as long as each side is secure and balanced. Just make sure the straps aren’t twisted or uneven.
Step 6: Lock All Four Corners
Every corner gets a strap. That’s non-negotiable. Tighten each one evenly so the car sits solid without straining the suspension.
Bonus: The Easy Release
Done with the trip? If you are using the “2 in x 15 ft Snap Hook Retractable Ratchet Straps (Direct Hook Type)”, just pop the ratchet handle open to about 180 degrees, and watch the strap rewind itself like a seatbelt. No tangles, no cursing, no wasted time.
💡 Need more detail? Here’s the full step-by-step: How to Tie Down a Car on a Trailer: Securing Cars With Retractable Ratchet Straps
2. Dirt Bikes: How to Keep Your Ride Upright
If you have ever tossed a dirt bike into the back of your truck and thought, “Eh, two straps should do it”, you’re not alone. But here’s the thing: bikes don’t just fall over when they are loose, they can bend handlebars, crush plastics, or even launch out of the bed if you hit a hard bump. Not the kind of highlight reel you want on race day. Retractable ratchet straps make this a whole lot easier. Just hook, ratchet, and lock. Here’s the quick version of how to tie a dirt bike down safely.
Note: Looking for the right gear? Our Outdoor Straps are best for motorcycles, kayaks, and general cargo.
Quick Steps for a Single Dirt Bike
1. Use soft loops first
Instead of clipping hooks straight to your bars, wrap soft loops around the handlebars. This saves your grips and gives the ratchet straps a clean anchor point.
2. Pick solid anchor spots
Hook one strap to the front of the truck bed and the other to the rear opposite corner. Strong tie-down points only, no “that screw looks sturdy enough.”
3. Tighten it down
Hook the straps to your soft loops, then ratchet until it’s firm and steady. Don’t crank like you’re arm-wrestling. The goal is snug, not broken forks.
4. Double-check
Give the bike a gentle shake. If it wiggles, tighten a touch more. If it’s rock solid, you are ready to roll.
Got Two Bikes?
Heading out with a buddy? Same idea, just doubled:
- Hook four straps (two front left, two front right).
- Load the first bike, hook the bars, tighten.
- Slide in the second bike so both front wheels touch.
- Strap it down, keeping both bikes leaning into each other.
Simple, secure, no drama.
A detailed guide: 6 Easy Steps to Tie Down a Dirt Bike in a Truck Bed
3. ATVs & UTVs: Locking Down Your Off-Road Beast
ATVs and UTVs are built for rugged trails, mud pits, and backcountry adventures, but the trip there? That’s all smooth highways and bumpy trailers. Tie them down wrong, and your “weekend fun machine” could become a roadside nightmare. The good news: with retractable ratchet straps, securing them is as straightforward as firing up the ignition. Here’s the quick rundown.
Note: For heavy-duty loads, our Transport Straps are the top choice.
Step 1: Anchor Your Straps
Start with your truck bed or trailer. You’ll need at least two solid anchor points, but four is better for maximum stability. Clip the retractable straps onto those points so they’re ready to roll.
Step 2: Use Soft Loops (Optional but Smart)
Not sure where to hook directly onto your ATV frame? Grab some soft loop straps. Wrap them around sturdy parts of the frame, then hook the retractable straps onto the loops. This avoids scratching up your ride and makes anchoring way easier.
👉 Tip: Strapinno has strap sets that include axle straps or soft loops, so you are covered either way.
Step 3: Pull the Strap
Open the ratchet handle, pull the strap out in line with the reel, and get it ready to secure. No tangles, no drama.
Step 4: Hook & Tighten
Attach the straps to your ATV’s frame (or the soft loops), then ratchet them down with a few solid pumps of the handle. Snug, but not crushing. That suspension still needs room to breathe. Once you are happy, push the handle down to the lock position.
Step 5: Easy Release
When you’re done riding, just unhook, pop the handle open, and give the strap a tug. It’ll retract back into the housing like a seatbelt. Clean, quick, zero fuss.
A detailed guide: What You Should Know About ATV/UTV Tie Down Straps
4. Snowmobiles: Strap Down for a Smooth Ride
Here’s how to lock it in:
Step 1: Load Up Like a Pro
Roll your snowmobile onto the trailer and center it over the axles. Align the skis with the front stops or chocks so the sled sits balanced. Take a step back, does it look solid and even? Good.
Step 2: Secure the Front
Hook retractable straps onto the front frame or skis, then connect the other ends to solid anchor points on your trailer. Ratchet them down snugly, but don’t crush the suspension. Tight enough to stop movement, loose enough to let the sled “breathe.”
Step 3: Lock Down the Rear
Grab another set of retractables and hook them to the rear frame or suspension arms. Anchor them to the back of the trailer, and tighten evenly so the rear doesn’t wiggle. Again, avoid overcompressing the suspension.
Step 4: Do the Shake Test
Give the sled a firm shake. If it shifts, crank the straps a touch more. If it’s rock solid, you nailed it. Bonus points: check that nothing’s rubbing against the trailer because scratches and gouges are no one’s friend.
Step 5: One Last Check
Before you hit the road, confirm all straps are locked, anchor points are solid, and the snowmobile is properly positioned. After a few miles on the road, pull over and double-check. It’s a small pit stop that saves big headaches.
Full Guide: How to Tie a Snowmobile Down With Tie Down Straps?
5. Bicycles: best tie-down methods and frame protection
Here’s the quick method:
Step 1: Pad the Tailgate
Start with a tailgate pad. It cushions both your bike and your truck, and gives the front wheel a steady perch as it hangs over the tailgate.
Step 2: Position the Bike
Roll the bike in so the front wheel rests over the tailgate and the back wheel sits flat in the truck bed. This stabilizes it before you strap it down.
Step 3: Wrap & Hook the Straps
Take your retractable straps and wrap them around the frame of the bike (not the wheels or handlebars). Clip the hooks to the tie-down points in the truck bed.
Step 4: Ratchet Tight
Give the handle a few solid pumps. Tight enough so the bike doesn’t wobble—but not so tight you crush the frame. A snug hold is all you need.
Step 5: Extra Stability (Optional)
Want it rock solid? Add wheel chocks or blocks around the rear wheel to stop side-to-side shifting.
Step 6: Quick Release
When you arrive, flip the handle to the release position, unhook, and let the strap auto-retract. No tangles, no leftover webbing to deal with.
A detailed guide: Bicycle Transport: 6 Easy Steps to Secure Your Bikes
6. Lawn tractor: Heavy Duty, No Surprises
Lawn tractors and zero-turn mowers aren’t exactly “highway vehicles,” but they’re still big, heavy machines that need to be tied down right. A loose mower bouncing on a trailer isn’t just risky. It can be downright dangerous. Retractable ratchet straps give you the muscle and the simplicity to lock your mower in tight without wrestling with excess webbing. Here’s the quick version:
Step 1: Load It Up
Raise the mower deck into transport mode so it won’t scrape. Drive it forward onto the trailer (never backward) and let the trailer settle. Parking brake on, engine off. Bonus tip: facing the mower forward means wind pushes the hood down instead of catching it like a sail.
Step 2: Position It Right
- Zero-turn mower: Heavy in the back, so line up the rear wheels just ahead of the trailer axle.
- Tractor-style mower: Weight sits more in the front, so center it over the trailer axle.
Balanced weight = safer ride.
Step 3: Anchor with Four Straps
Always go with four points of contact. Hook one retractable ratchet strap at each corner of the mower to solid anchor points on the trailer (E-tracks or D-rings if you’ve got them).
Step 4: Hook to the Frame (or Axle)
Best bet is the mower’s frame. If you can’t find a good hook spot, loop the strap around the axle and feed it through the hook for a solid hold.
Step 5: Ratchet Tight
Crank the handle until the straps are snug but not crushing anything. Push the handle down to lock it. Give the mower a shake test. If there’s wiggle, tighten or add an extra strap.
Step 6: Easy Release
At your destination, pull the release bar, open the handle, give the strap a tug, and watch it retract cleanly. Zero mess, zero hassle.
A detailed guide: How to tie down a lawn tractor to a trailer? 6 Easy Steps!
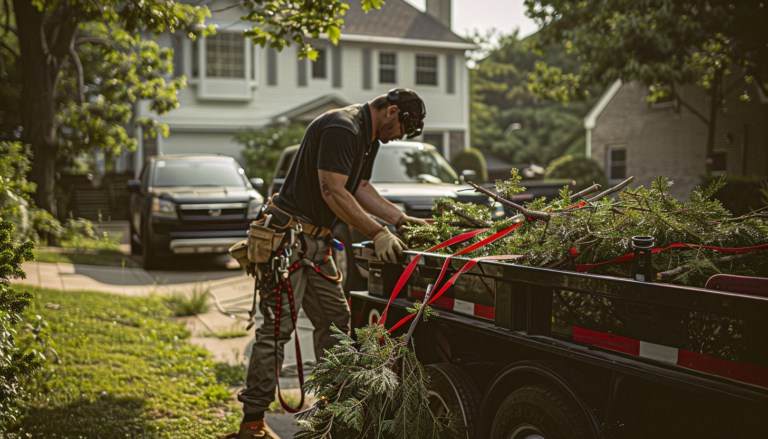
7. Moving Furniture: Keep That Couch from Surfing Out the Back
Moving a couch looks easy until you hit the first pothole and watch it shimmy like it’s about to stage-dive off your trailer. Retractable ratchet straps turn “barely balanced” into “rock solid” in just a few minutes. Plus, with their auto-retract feature, you’re not fighting with yards of tangled webbing after a long moving day. Here’s the quick playbook:
Step 1: Prep the Couch
- Strip off cushions and detachable parts to lighten the load.
- Wrap the couch in moving blankets or pads to prevent scratches and torn fabric. Tape or bungee cords keep the padding in place.
Step 2: Position on the Trailer
- Flat is best → lay the couch down if space allows, to keep the center of gravity low.
- Upright option → if it won’t fit flat, place it upright against the trailer wall with the backrest against the side.
Step 3: Strap It In
- Hook your retractable straps to solid anchor points.
- Run the straps over and around the couch, then ratchet until snug.
- Don’t over-tighten. You want it held in place, not crushed.
Step 4: Add Extra Stability
- Loop extra straps, rope, or bungees around it if you’ve got them.
- Do the shake test: if it wobbles, tighten or add another strap until it’s solid.
Bonus: Using Retractable Straps for Furniture Moves
Strapinno’s 1 in x 15 ft retractable straps (WLL 1000 lbs, breaking strength 3000 lbs) are ideal for couches, dressers, and other bulky furniture.
- Press the release button, pull out the strap, hook onto anchor points.
- Ratchet up and down until tight, then snap the handle closed to lock.
- At your new spot, flip the handle open, unhook, and let the straps retract themselves. Easy.
A detailed guide: How to Secure a Couch to a Trailer: Step-by-Step Guide
Water Transport
Boat and jet skis: marine straps
Kayaks, canoes, surfboards: outdoor straps
1. Boats: How to Tie Down Without the Headache
For marine use, check our Marine Straps, built to handle saltwater and boat trailers, or our FlexiSecure Loop Transom Strap.
Step 1: Measure & Mark
If you don’t already have brackets, hold the retractable strap against your trailer and mark where the bolts will go. A good trick: clip the hook onto your boat first, then line up the strap on the trailer so the pull is straight. That way you’re not strapping at a weird angle.
Step 2: Drill the Mount
Grab a 3/4-inch drill bit and drill out the hole for the bolt. (If your trailer already has mounting holes, skip this step and count yourself lucky.)
Step 3: Bolt It Down
Slide the bolt through the retractable strap housing, secure it with a nut and washer, and tighten it in place. Make sure the strap can pull straight before you crank it fully tight. Brackets help if you need extra stability.
Step 4: Hook to the Boat
Push the release button on the ratchet, pull the strap out, and clip it to a solid point on your boat. Don’t worry. The hooks are rubber-coated, so they won’t scratch your hull.
Step 5: Ratchet Tight
Crank the handle until the strap feels snug. Think guitar string tight: secure, but not crushing.
Step 6: Easy Release
At the ramp, flip the handle down to unlock, unhook from the boat, press the release button, and let the strap retract itself. No tangles, no wrapping, no wet mess to deal with.
A complete guide: 4 Steps to Tie Down a Boat to a Trailer Using Boat Tie Down Straps
2. Jet Ski tie-down methods
Below is the short version of how to do it right. For a complete guide, read more here: 5 Steps to Tie Down a Jet Ski on a Trailer
Standard Tie-Down (Basic Setup)
- Position the ski: Center it on the trailer, nose forward, balanced over the supports.
- Hook to trailer anchor points: Clip one end of the straps to solid metal points (not plastic trim).
- Hook to the ski: Use the stern eye or tow hook at the rear of the jet ski. Repeat on both sides so the pull is even.
- Tighten: Ratchet until snug. You want secure tension, not a suspension squeeze.
- Double-check: Look for twists, knots, or loose ends before hitting the road. Check again at pit stops.
Bolt-On Retractable Straps
Want something even easier? Bolt-on straps mount right to your trailer, so they’re always there when you need them.
- Measure and mark where to bolt the housing.
- Drill a hole, slide in the bolt, and tighten with a nut and washer.
- Hook to the ski, ratchet down, done.
No hunting for straps, no storage headaches.
3-Point Retractable Straps
For extra stability, a 3-point system gives you three anchors: one on each side of the trailer plus the tow eye on the ski.
- Hook the fixed end to the trailer.
- Attach the floating hook to the tow eye.
- Clip the retractable end to the other side of the trailer.
- Ratchet until secure.
This spreads out the pressure and keeps the ski rock solid.
FlexiSecure Loop Transom Strap
If you want quick in-and-out:
- Hook both ends between the ski and trailer.
- Pump the handle to tighten.
- Press the button to release and auto-retract.
Simple, fast, and built for repeat launches.
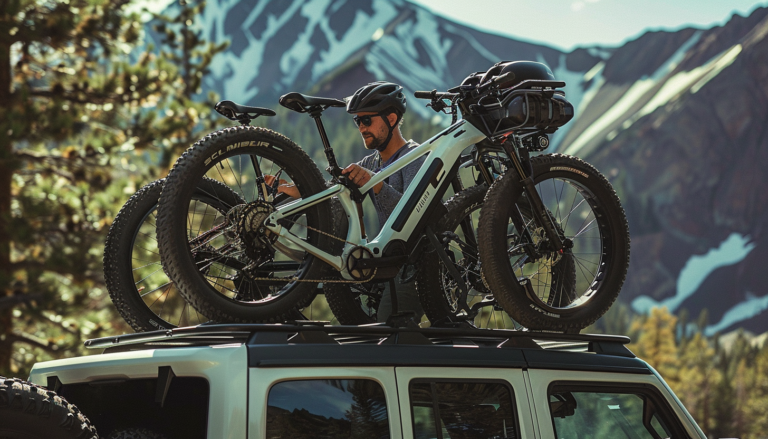
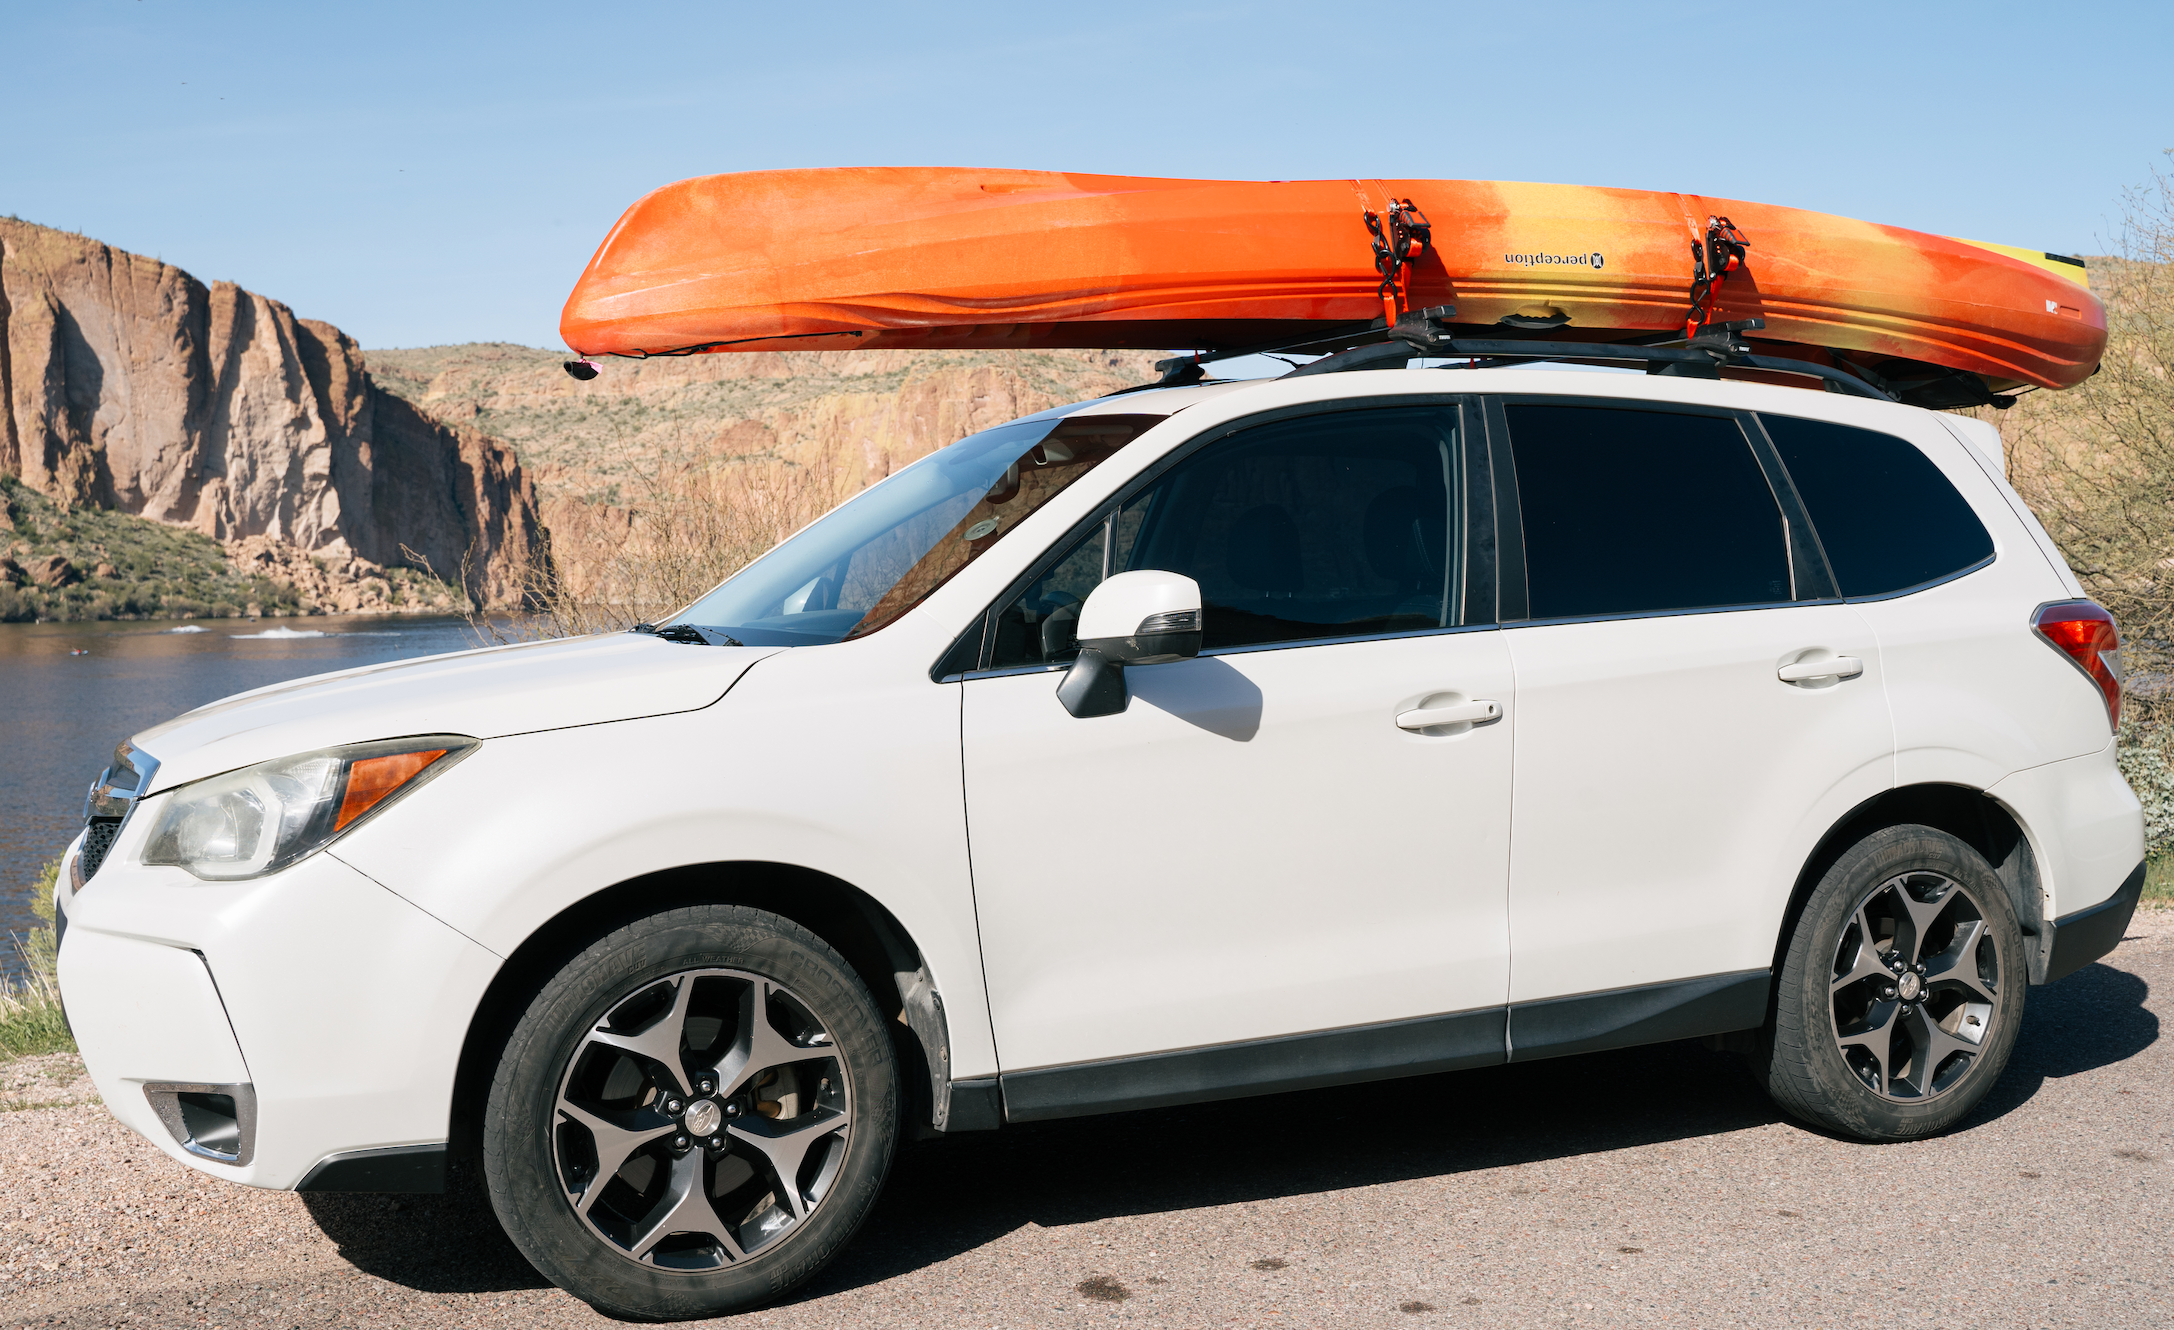
3. Kayaks: Keep Your Paddle Buddy Safe on the Roof
Below is the quick version of how to tie down your kayaks. For a complete guide: How to Tie down a Kayak or Two Kayaks With Retractable Ratchet straps
One Kayak on the Roof Rack
- Protect your car first. Slide a foam roller or pool noodle over the strap on your roof rack. Instant scratch guard for both your kayak and your paint job.
- Lift carefully. Nose first, then back end, keeping the kayak balanced as you raise it.
- Center it. Line it up on the roof racks so it’s nice and balanced.
- Use soft loops (optional). Wrap soft loops around the rack bars for cleaner anchor points.
- Strap it down. Hook your retractable straps (front and rear), ratchet until snug, and lock the handles.
- Shake test. Give the kayak a wiggle, it should feel steady, not wobbly.
Two Kayaks on a Roof Rack
Got company? Here’s how to haul a pair safely:
- Invest in a J-rack. Trust us, it keeps things upright and stable.
- Load the first kayak. Position it on its side against the rack or foam block.
- Strap it down. Use two retractables (front and rear). Hook, tighten, lock.
- Load the second kayak. Place it next to the first, also on its side.
- Strap it down too. Same deal. Two straps, front and rear.
- Final check. Shake each kayak gently. Minimal movement = you’re good to go.
Safety Notes
- Use four straps total for two kayaks, two for each boat.
- Don’t just throw a strap over both and hope for the best. That’s how kayaks become highway hazards.
- Drive smooth: sudden stops or sharp turns put extra stress on the straps.
4. Surfboards & SUP
Surfboards are great at catching waves, but not so great at catching highway wind. Whether you’re loading a single board for dawn patrol or stacking two for a beach trip with friends, the right tie-down technique makes all the difference. Retractable ratchet straps give you that sweet combo of fast setup and rock-solid hold, without dangling ends flapping in the breeze.
A detailed guide: The Best Way to Secure a Surfboard to a Roof Rack
One Surfboard
- Gear check: At least two retractable ratchet straps, plus a roof rack or truck bed. Padding or a board bag is highly recommended.
- Position it:
- On a roof rack → deck facing down, fin up, nose forward, parallel to the car.
- In a truck bed → lay flat, with straps placed near nose and tail.
- On a roof rack → deck facing down, fin up, nose forward, parallel to the car.
- Strap it: Hook straps to crossbars (or anchor points in the bed), one near the front and one near the back. Ratchet until snug, tight enough to stop movement, but not so tight that you dent the rails.
- Check: Give it a shake. If it moves, tighten a bit more.
Two Surfboards
Doubling up? Totally doable if you do it right:
- First board: Place it deck down, fin up, nose forward.
- Padding: Lay a towel or foam between boards, keeping them from rubbing and dinging.
- Second board: Same orientation, stacked right on top. Align noses and tails as evenly as possible.
- Strap down: Two straps, front and back. Loop them over both boards and under the crossbars, then ratchet until snug.
- Final shake test: Boards shouldn’t budge more than a hair. If they shift, readjust.
Extra Tips
- Always use padding or a board bag for extra protection.
- Don’t overload the rack with too many boards at once.
- On longer drives, pull over to recheck strap tension. The wind likes to play games.
Wrapping It Up: Secure, Simple, Stress-Free
Whether you are hauling a kayak to the lake, a dirt bike to the track, or a lawn tractor across town, the game is the same: keep it safe, keep it simple, and don’t waste time fighting with old-school straps. Retractable ratchet straps give you faster setup, cleaner storage, and rock-solid hold without the spaghetti mess. We’ve covered a lot of ground here:
- Land transport & equipment like cars, ATVs, UTVs, dirt bikes, snowmobiles, and lawn tractors.
- Water transport from boats and jet skis to kayaks and surfboards.
- Outdoor & adventure gear including bikes, camping gear, furniture, and everyday moving needs.
Head over to our shop and browse by category to find the straps that fit your needs best:
- Outdoor = motorcycles, kayaks, furniture, general cargo
- Marine = boats & jet skis
- Transport = ATVs, UTVs, cars, lawn equipment, heavy loads
Each of these categories has straps built to match, so you are not just securing your cargo, you’re choosing the right tool for the job. At the end of the day, strapping down your gear shouldn’t be a guessing game. With the right retractable ratchet straps, you’ll spend less time wrestling webbing and more time enjoying the road, the trail, or the water. Safe travels, and may your cargo never budge an inch.